

The production of hollow plastic products is a marvel of modern engineering. Every day, we interact with items like water bottles, milk jugs, and automotive fluid tanks without considering how they are made. These products are the result of a precise industrial process centered on the blow molding machine. Understanding how this equipment functions is essential for anyone in the manufacturing, packaging, or product design sectors.
This guide provides a detailed, step by step look at the inner workings of a blow molding machine. We will explore the journey from raw plastic pellets to a finished, functional container.
The Basic Principle of Blow Molding
Before diving into the steps, it is helpful to understand the core concept. Blow molding is essentially a combination of extrusion or injection molding and the ancient art of glassblowing. The machine uses heat to melt plastic and then uses air pressure to inflate that plastic inside a mold.
The blow molding machine is designed to handle thermoplastics. These are plastics that become soft and pliable when heated and turn solid when cooled. This transition allows the machine to reshape the material repeatedly without degrading its chemical properties.
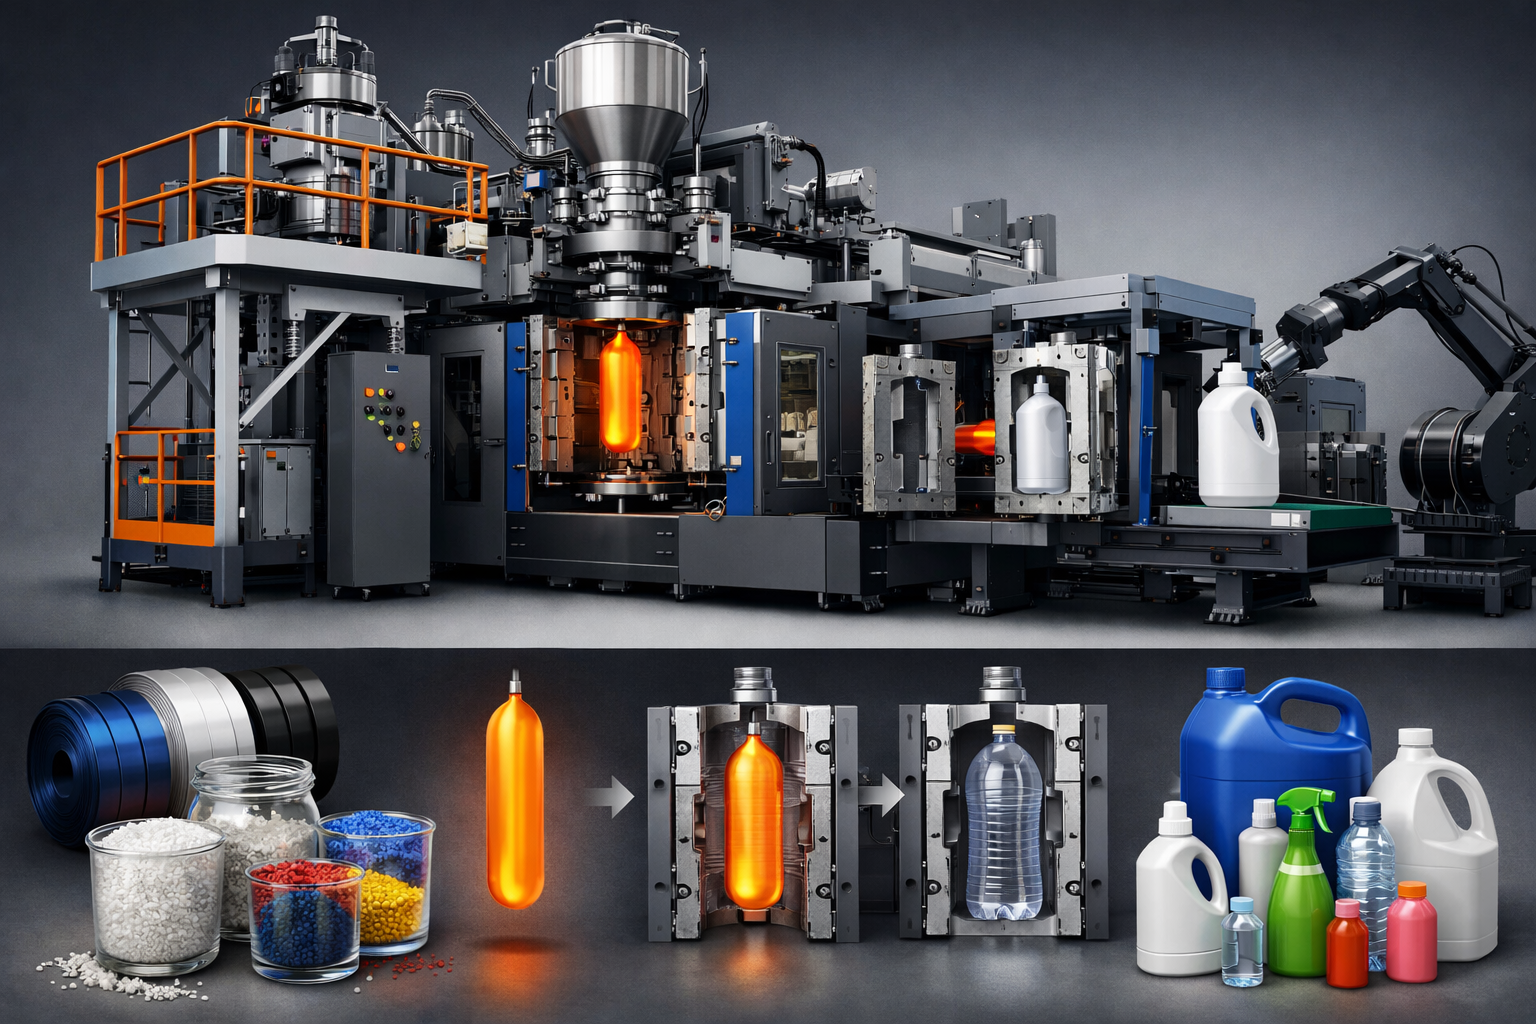
Step 1: Material Preparation and Plasticization
The process begins at the hopper of the blow molding machine. Manufacturers load raw plastic resin pellets, often mixed with colorants or UV stabilizers, into this hopper. Gravity or a vacuum system feeds these pellets into the extruder barrel.
Inside the barrel, a large reciprocating screw rotates. As the screw turns, it pushes the plastic pellets forward. Two things happen here: electric heater bands surrounding the barrel apply heat, and the friction generated by the rotating screw creates kinetic heat. This combined heat melts the plastic into a thick, uniform molten liquid. This stage is known as plasticization.
Step 2: Creating the Parison or Preform
Once the plastic is fully melted, the blow molding machine must prepare it for inflation. Depending on the type of machine, it creates either a parison or a preform.
In extrusion blow molding, the molten plastic is pushed through a die head to form a "parison." A parison is a hot, hollow tube of plastic that hangs vertically from the machine. In injection blow molding, the machine first injects the plastic into a small mold to create a "preform," which looks like a small test tube with a threaded neck.
The precision of this stage is vital. The machine must ensure the wall thickness of the parison is consistent so the final product does not have thin spots that could lead to leaks or failures.
Step 3: Mold Clamping
After the parison has reached the correct length, the two halves of a metal mold close around it. The mold is usually made of aluminum or steel and is precision-machined to the exact outer dimensions of the desired product.
As the mold halves clamp together, the bottom of the parison is pinched shut. This creates an airtight seal at the base of the plastic tube. At the top, the plastic remains open around a blow pin or a nozzle. The clamping force of the machine is significant, ensuring that the mold does not fly open during the high-pressure inflation stage.
Step 4: The Inflation Phase
With the parison securely clamped inside the mold, the blow molding machine begins the inflation process. Compressed air is injected through the blow pin into the center of the hollow parison.
The air pressure forces the hot, soft plastic outward in all directions. The plastic expands until it hits the inner walls of the mold cavity. Because the plastic is still molten, it picks up every detail of the mold, including textures, logos, and structural ribs. This is the moment the hollow shape is officially formed.
The machine must maintain a specific air pressure. If the pressure is too low, the plastic will not conform perfectly to the mold. If it is too high, it could damage the mold or cause the plastic to thin out too much in certain areas.
Step 5: Cooling and Solidification
Plastic retains heat for a significant amount of time. To make the shape permanent, the product must be cooled while it is still inside the mold. If the mold opened too early, the hot plastic would collapse or deform under its own weight.
Modern blow molding machines use internal cooling systems to speed up this step. Water channels are bored into the metal mold halves, and cold water is constantly circulated through them. As the hot plastic touches the cold metal, it transfers its heat and solidifies rapidly. The cooling time usually represents the longest part of the production cycle, so efficient cooling is key to high productivity.
Step 6: Ejection and Finishing
Once the sensors on the blow molding machine determine the plastic is sufficiently cool and rigid, the air pressure is released. The mold clamps open, and the finished part is ejected. This is often done using mechanical "ejector pins" or a blast of air.
In extrusion blow molding, there is usually excess plastic at the top and bottom where the mold pinched the parison shut. This excess is called "flash." Many machines have integrated trimming stations that automatically cut away this flash. The trimmed plastic is not wasted: it is sent to a grinder, turned back into pellets, and fed back into the machine for the next cycle.
Components That Drive the Machine
To perform these steps effectively, a blow molding machine relies on several critical components:
-
The Extruder: This is the heart of the machine that melts and moves the plastic.
-
The Die Head: This shapes the molten plastic into the hollow parison.
-
The Clamping Unit: This provides the hydraulic or electric force needed to keep the molds closed.
-
The Control System: Modern machines use advanced PLCs (Programmable Logic Controllers) to monitor temperature, pressure, and timing to a fraction of a second.
-
The Blow Pin: This is the interface that delivers the compressed air into the plastic.
Why Choose This Manufacturing Method?
The blow molding machine offers unique advantages over other plastic molding techniques. It is the most cost-effective way to create large, hollow objects. Unlike injection molding, which requires complex internal cores to create hollow spaces, blow molding uses air. This simplifies the tooling and reduces the weight of the final product.
Additionally, the process is highly scalable. A single blow molding machine can be configured to produce small 10ml medical vials or massive 1,000-liter industrial chemical IBCs.
Conclusion
The operation of a blow molding machine is a perfect balance of heat, pressure, and timing. By following this step by step guide, you can see how raw materials are transformed into the essential containers we use every day. As technology advances, these machines are becoming faster, more energy-efficient, and more capable of using recycled materials, ensuring they remain a pillar of global manufacturing for years to come.
Frequently Asked Questions
1. What materials are best for a blow molding machine?
The most common materials are High-Density Polyethylene (HDPE), Low-Density Polyethylene (LDPE), Polypropylene (PP), and Polyethylene Terephthalate (PET).
2. Can one machine make different shaped bottles?
Yes. You can change the shape by swapping out the metal molds. However, the machine must be sized correctly to handle the volume of the new mold.
3. How do you prevent thin walls in the final product?
Modern machines use "parison programming." This allows the machine to adjust the thickness of the plastic tube as it is being extruded to ensure corners and edges have enough material.
4. What is the difference between a parison and a preform?
A parison is a long, continuous tube used in extrusion blow molding. A preform is a molded, test-tube shaped piece used in injection or stretch blow molding.
5. How long does a blow molding machine last?
With proper maintenance, a high-quality industrial blow molding machine can last 20 to 30 years. Regular lubrication and cleaning of the extruder are essential for longevity.